 Pin to board
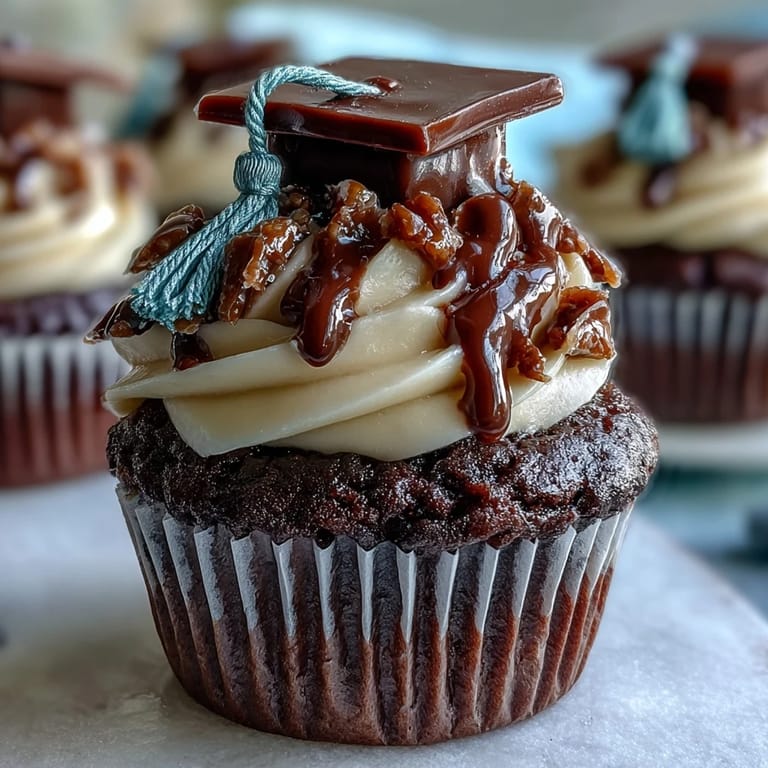
 My cousin texted me three weeks before graduation asking if I could bring something to her party, and my immediate thought was cupcakes with those little cap toppers I'd seen online. Turns out, making them is way simpler than it looks, and watching her face light up when she saw the tiny graduation hats on top made the whole thing worthwhile. These aren't fussy or complicated, but they feel special enough for the moment. They're the kind of dessert that says you put thought into celebrating someone's big day without spending all afternoon in the kitchen.
I made these for a small gathering at my neighbor's house, and honestly, the best part wasn't even the tasting, it was the moment when one of the graduates picked hers up and actually laughed at how cute the tiny cap looked. There's something about a dessert that makes people smile before they even bite into it that just feels right for marking an accomplishment.
Ingredients
- All-purpose flour: The foundation of your cupcake, and measuring it by weight if you have a scale makes them more consistent every time.
- Granulated sugar: Creamed together with butter first, this is what gives the cupcakes their tender crumb and slight sweetness without being cloying.
- Unsalted butter, softened: Using softened butter instead of cold ensures your batter mixes smoothly and your frosting whips up fluffy and light.
- Large eggs: They bind everything together and add structure, so don't skip them or substitute with anything else.
- Whole milk: This keeps the cupcakes moist and tender without making them feel heavy or dense.
- Baking powder: Your leavening agent, and make sure it's fresh since old baking powder won't give you the lift you need.
- Salt: Just a pinch to balance the sweetness and bring out the vanilla flavor.
- Pure vanilla extract: Worth the extra dollar or two over imitation, it actually tastes like something instead of like chemicals.
- Powdered sugar, sifted: Sifting it beforehand means no lumpy frosting, which is the difference between smooth and grainy.
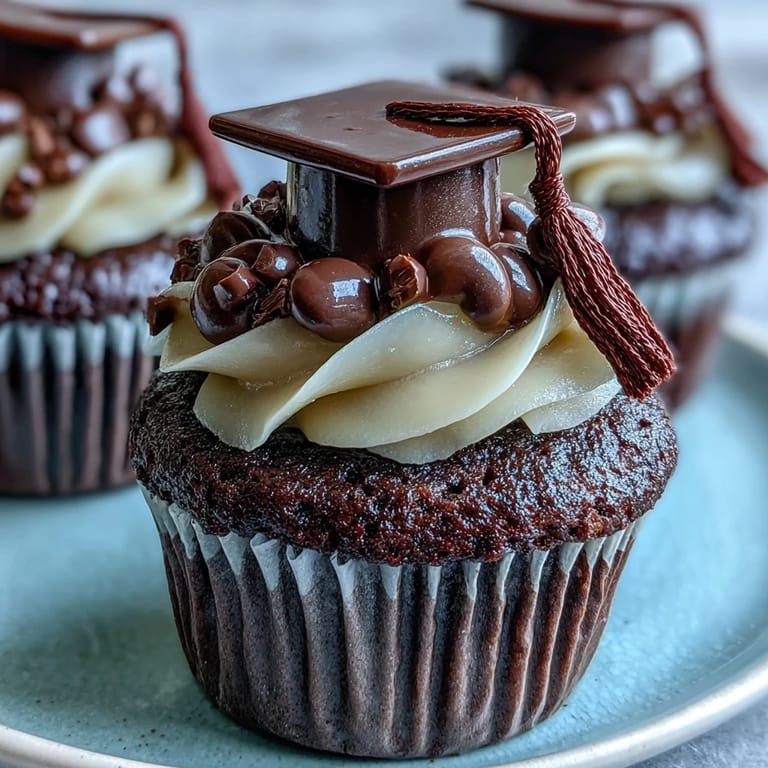
- Mini peanut butter cups: These become the brim of your graduation cap, and if anyone has nut allergies, you can swap them for more chocolate squares.
- Chocolate square candies: These are the flat base of your cap, so pick ones that feel sturdy and look decent.
- String licorice or sour candy strips: Cut into pieces, these become your tassel, and the color actually matters for the final look.
- Mini M&Ms or candy pearls: These tiny candies sit on top like the button on a real graduation cap, adding a polished finish.
Tired of Takeout? 🥡
Get 10 meals you can make faster than delivery arrives. Seriously.
One email. No spam. Unsubscribe anytime.
Instructions
- Get your workspace ready:
- Preheat your oven to 350°F and line your muffin tin with paper liners while the oven comes to temperature. This takes just two minutes and saves you from rushing later.
- Cream butter and sugar:
- Beat them together until the mixture looks pale and fluffy, like you're making clouds in a bowl, usually about three minutes with an electric mixer. This step is crucial because it aerates your batter and helps your cupcakes rise evenly.
- Add eggs and vanilla:
- Drop in one egg, mix until it disappears into the butter mixture, then add the second egg and vanilla. Don't rush this part or your batter might look separated and weird.
- Mix your dry ingredients separately:
- In another bowl, whisk together flour, baking powder, and salt so the baking powder spreads evenly throughout. This prevents pockets of baking powder that would taste bitter.
- Combine everything gently:
- Add half the dry mixture to the butter mixture, mix, then add milk, then the rest of the dry ingredients, mixing just until you don't see streaks of flour anymore. Overmixing makes tough cupcakes, so stop as soon as it comes together.
- Fill and bake:
- Divide batter evenly among liners, fill them about two-thirds full, and bake for 18 to 20 minutes until a toothpick poked in the center comes out clean or with just a few moist crumbs. They should smell incredible at this point.
- Cool completely:
- Let them sit in the tin for five minutes, then transfer to a wire rack and wait until they're totally cool before frosting. Frosting warm cupcakes makes everything slide around.
- Make your buttercream:
- Beat softened butter until smooth, gradually add sifted powdered sugar while mixing, then add milk, vanilla, and salt, beating until fluffy and spreadable. If it's too thick, add milk a teaspoon at a time.
- Frost with confidence:
- Spread or pipe frosting onto each cooled cupcake in a swirl, making the top reasonably flat so your cap topper sits steady. A small offset spatula works better than a knife for this.
- Assemble your caps:
- Place a chocolate square flat-side up, attach an upside-down peanut butter cup in the center with a tiny dab of melted chocolate or frosting, then stick a licorice piece to the side as a tassel and a candy on top as the button. Let them set for five minutes so everything stays put.
- Crown your cupcakes:
- Press each finished cap topper gently into the frosting on top of a cupcake, making sure it's centered. Step back and admire your work before anyone eats them.
 Pin to board
 What strikes me about these cupcakes is that they're not just dessert, they're a tiny edible celebration of someone's hard work and next chapter. I've made them twice now, and both times the person eating them seemed genuinely touched that I'd taken the time to make something that acknowledged their achievement in such a thoughtful way.
Making These Work for Your Event
These cupcakes scale beautifully if you need more than a dozen, just multiply the ingredient amounts and bake in batches. The cap toppers can be made hours or even a day ahead and stored in a cool, dry place, so you can break the project into smaller steps if you're short on time. I usually make my frosting the day of but prep all the cap pieces the night before, which cuts down stress significantly.
Storage and Make-Ahead Tips
Unfrosted cupcakes wrapped tightly will keep for a day or two before they start drying out, and frosted cupcakes in an airtight container stay fresh at room temperature for up to two days. If you need them to last longer, freeze unfrosted cupcakes for up to a month, then thaw and frost when you're ready to serve. The cap toppers are best assembled no more than a few hours before serving since the frosting and chocolate can get sticky or separate in heat.
Personalizing Your Cupcakes
One of the fun things about this recipe is how much you can customize it without changing the actual cupcakes at all. Add a few drops of food coloring to your frosting to match the graduate's school colors, or use different colored licorice for the tassels if you can find them. You can even top each cap with a tiny initial candy or sprinkle school colors as edible glitter on the frosting before the cap goes on.
- Swap the vanilla frosting for chocolate buttercream if that's the graduate's favorite flavor.
- Try different candies for the button on top, like a single jelly bean or a fondant disc in a coordinating color.
- If you're making these for multiple graduates, write their names on the frosting with a food marker before adding the cap topper.
 Pin to board
 These cupcakes deserve to be made for a celebration, whether that's a graduation party or just marking a personal win. They're simple enough that you can focus on enjoying the moment instead of stressing over complicated steps, which is exactly how a celebration dessert should feel.
Recipe Questions & Answers
- → How do I make the edible cap toppers?
Assemble the toppers by placing a chocolate square flat, attaching a mini peanut butter cup upside-down using melted chocolate or frosting, add a licorice strip tassel, and a mini candy as the button.
- → Can I make these without nuts?
Yes, substitute peanut butter cups with chocolate squares to accommodate nut allergies safely while maintaining the cap design.
- → What’s the best way to store the cupcakes?
Store cupcakes in an airtight container at room temperature for up to two days to keep them fresh and moist.
- → Can I color the frosting?
Yes, adding food coloring to the buttercream allows customization to match party themes or school colors.
- → How long does preparation and baking take?
Preparation takes about 25 minutes, and baking time is around 20 minutes, totaling approximately 45 minutes.