 Pin to board
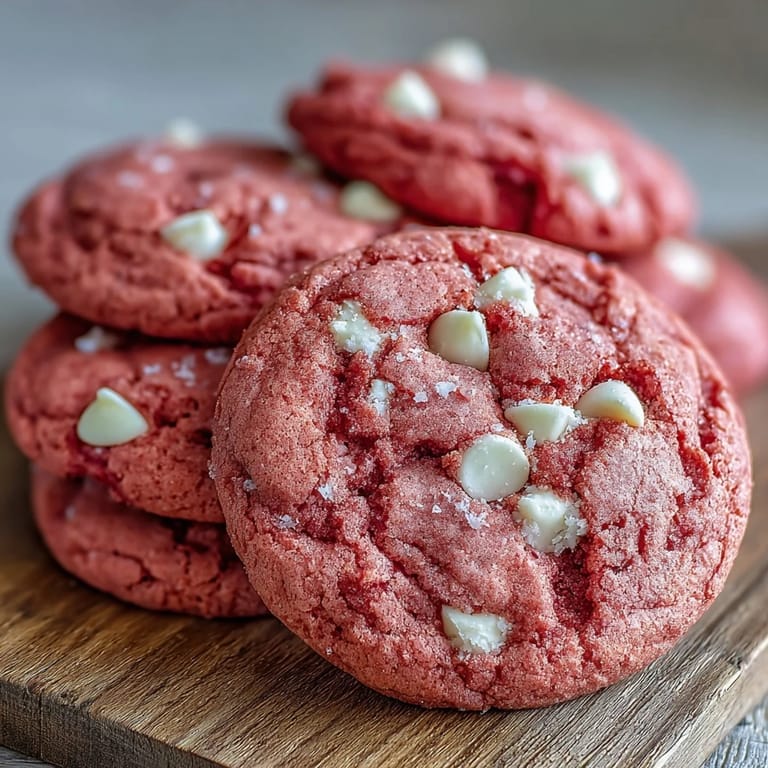
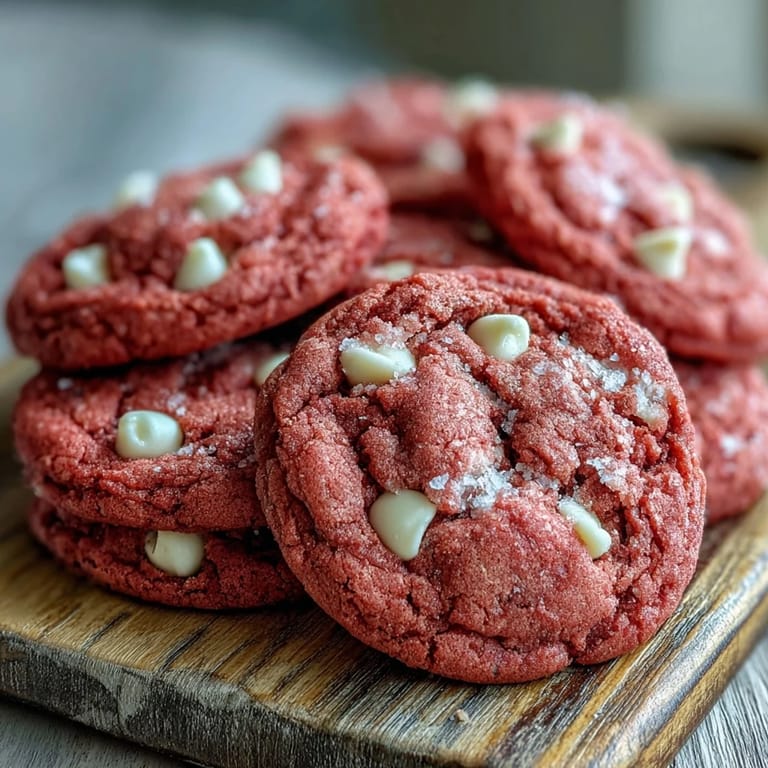
 My daughter burst into the kitchen one Saturday morning asking if cookies could be pink and taste like vanilla clouds. I laughed, but the question stuck with me all through breakfast. By afternoon, I was standing at the counter with butter, sugar, and a tiny bottle of gel coloring, determined to figure it out. The first batch came out more coral than cotton candy, but she declared them perfect anyway. That's when I learned that sometimes the best recipes start with a kid's wild idea.
I brought a tin of these to a potluck once, and three people asked if I'd used a secret red velvet hack. The truth is simpler and somehow more fun: it's all about that gel coloring and good vanilla. One friend admitted she'd been intimidated by colored cookies, thinking they required special skills or weird ingredients. We stood in the host's kitchen while I explained it on a napkin, and she texted me a photo of her own batch two days later. There's something about a recipe that makes people feel capable that I really love.
Ingredients
- All-purpose flour (2 ½ cups): This gives the cookies structure without making them cakey, and I've learned that spooning it into the measuring cup instead of scoking prevents dense results.
- Baking powder (1 teaspoon): It adds a subtle lift that keeps the cookies from spreading too flat on the pan.
- Baking soda (½ teaspoon): Just enough to give a little chew and help with browning on the edges.
- Salt (½ teaspoon): Never skip this because it balances the sweetness and makes the vanilla taste richer.
- Unsalted butter (1 cup, softened): I leave mine on the counter for about an hour so it creams properly without turning greasy.
- Granulated sugar (1 ½ cups): The backbone of sweetness and it helps create those crackly tops I love.
- Large egg (1): Binds everything together and adds moisture, plus it helps the color distribute evenly through the dough.
- Vanilla extract (2 teaspoons): Use the real stuff if you can, it makes a noticeable difference in flavor.
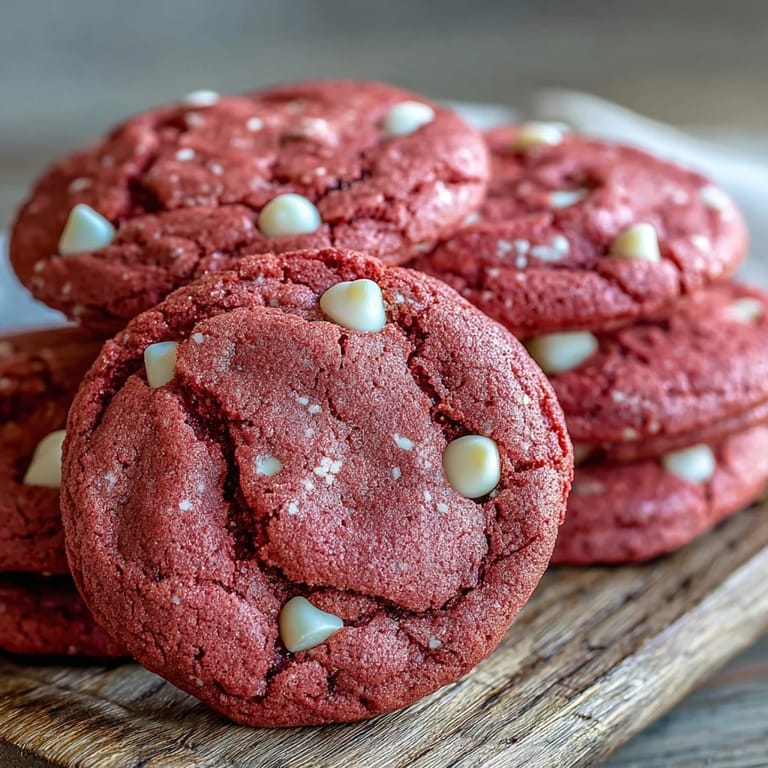
- Pink gel food coloring (2 teaspoons): Gel is key because liquid coloring can throw off the dough texture, and you control the intensity easily.
- White chocolate chips (1 cup): They look gorgeous against the pink and add creamy bursts that regular chocolate just can't match here.
Tired of Takeout? 🥡
Get 10 meals you can make faster than delivery arrives. Seriously.
One email. No spam. Unsubscribe anytime.
Instructions
- Prep the dry mix:
- Whisk your flour, baking powder, baking soda, and salt in a medium bowl until everything looks evenly blended. Set it off to the side so it's ready when you need it.
- Cream butter and sugar:
- Beat the softened butter and sugar together with a mixer for 2 to 3 minutes until the mixture turns pale and fluffy, scraping down the sides halfway through. This step adds air and makes the cookies tender.
- Add egg and color:
- Mix in the egg and vanilla until smooth, then squeeze in the gel coloring and beat until the dough turns an even shade of pink. Don't be shy, you can always add more if you want it brighter.
- Combine wet and dry:
- Add the flour mixture gradually on low speed, mixing just until no streaks remain. Overmixing makes tough cookies, so stop as soon as it comes together.
- Fold in chips:
- Use a spatula to gently fold the white chocolate chips through the dough, making sure they're distributed without overworking the batter.
- Chill the dough:
- Cover the bowl with plastic wrap and refrigerate for 30 minutes so the dough firms up and the cookies hold their shape in the oven. I use this time to clean up or preheat.
- Preheat and prep pans:
- Set your oven to 350°F and line two baking sheets with parchment paper. Don't skip the parchment or you'll be scraping cookies off the pan later.
- Scoop and space:
- Use a tablespoon or cookie scoop to portion the dough into balls, placing them about 2 inches apart on the sheets. They spread a little but not too much.
- Bake until set:
- Slide the sheets into the oven and bake for 10 to 12 minutes, until the edges look set but the centers still seem soft. They'll look slightly underdone, and that's exactly what you want.
- Cool properly:
- Let the cookies rest on the baking sheets for 5 minutes to firm up, then move them to a wire rack to cool completely. Rushing this step leads to broken cookies.
 Pin to board
 My neighbor once told me these reminded her of the cookies her grandmother used to make, except those were plain sugar cookies. She said something about how food doesn't have to be exactly the same to bring back a feeling. I think about that a lot now when I bake, how a simple twist on something familiar can create a whole new memory for someone. These pink cookies have become that for a lot of people in my life, and it makes me happy every time I pull a batch from the oven.
Customizing Your Cookies
If you want to switch things up, try adding half a teaspoon of almond extract for a subtle floral note that pairs beautifully with the vanilla. A few drops of rose water can take them in a fancy direction, perfect for spring gatherings or tea parties. For a fun surprise, press a few extra white chocolate chips on top of each dough ball right before baking so they look bakery perfect. I've also made these with dark chocolate chips when I'm out of white, and while the contrast isn't as striking, the flavor is amazing.
Storage and Make Ahead Tips
These cookies stay soft in an airtight container at room temperature for up to a week, though they rarely last that long in my house. If you want to prep ahead, you can scoop the dough into balls, freeze them on a baking sheet, then transfer to a freezer bag and bake straight from frozen, adding an extra minute or two to the baking time. I've also rolled the dough into a log, wrapped it tightly, and sliced off rounds whenever the craving hits. It's one of those recipes that adapts to your schedule instead of demanding you drop everything.
Serving Suggestions
These are perfect on their own with a cold glass of milk, but I've also sandwiched them with cream cheese frosting for birthday parties and baby showers. They look stunning on a platter next to fresh berries or arranged in a clear jar tied with ribbon as a gift. One time I crumbled a couple over vanilla ice cream and it was like a deconstructed cookie sundae that everyone loved.
- Serve them warm with a scoop of strawberry ice cream for an over the top dessert.
- Pack them in lunchboxes or care packages because they travel well and always bring a smile.
- Pair them with hot tea or coffee for an afternoon pick me up that feels a little fancy.
 Pin to board
 There's something about pulling a tray of these from the oven that just feels right, like you've made something that's equal parts pretty and delicious. I hope they become a favorite in your kitchen the way they have in mine.
Recipe Questions & Answers
- → What makes pink velvet cookies different from regular sugar cookies?
Pink velvet cookies have a softer, more tender texture similar to red velvet cakes, achieved through careful creaming of butter and sugar. The pink gel coloring gives them their signature vibrant hue, while white chocolate chips add creamy sweetness throughout each bite.
- → Can I use liquid food coloring instead of gel?
Gel food coloring works best because it provides vibrant color without adding excess liquid to the dough. Liquid coloring can alter the texture and may require additional flour to compensate. If using liquid, start with a few drops and adjust gradually.
- → Why is chilling the dough important?
Chilling for 30 minutes firms up the butter, preventing cookies from spreading too thin in the oven. It also allows flavors to meld and develop, resulting in better taste. Skipping this step may lead to flat, thin cookies.
- → How do I know when the cookies are done baking?
The cookies are ready when edges are set and lightly golden but centers still appear slightly underbaked. They will continue cooking on the hot baking sheet and firm up as they cool. This technique ensures soft, chewy centers.
- → Can I freeze the dough or baked cookies?
Yes! Scoop dough balls, freeze on a tray, then transfer to a freezer bag for up to 3 months. Bake from frozen, adding 1-2 minutes to baking time. Baked cookies freeze well for up to 3 months when stored in airtight containers with parchment between layers.
- → What variations can I try with this recipe?
Add ½ teaspoon almond extract for nutty depth, or rose water for floral notes. Create cookie sandwiches by spreading cream cheese frosting between cooled cookies. For gluten-free versions, use a 1:1 gluten-free flour blend and ensure your white chocolate chips are certified GF.