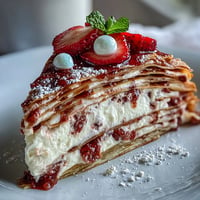
 Pin to board
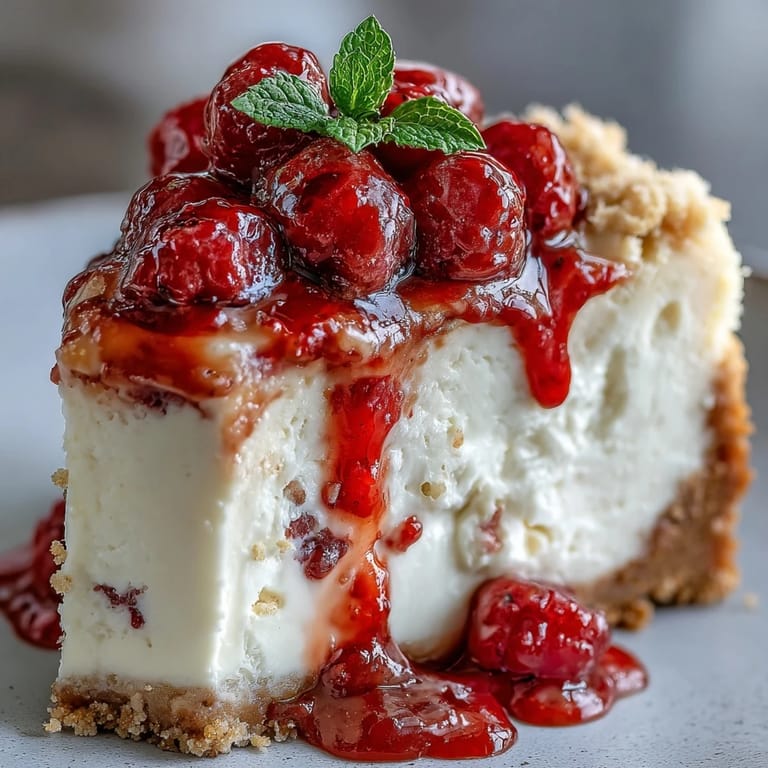
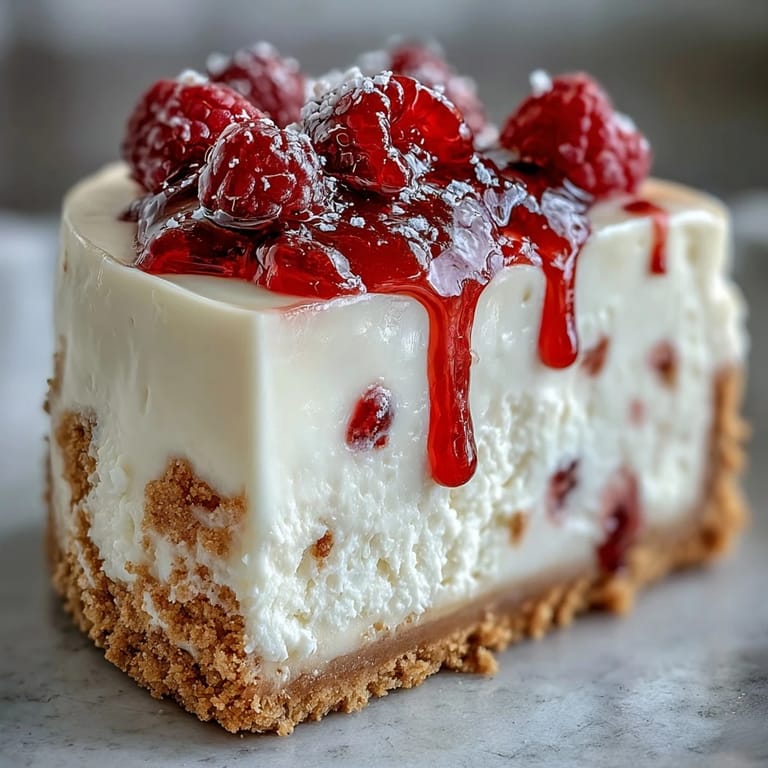
 My neighbor knocked on my door one Saturday morning holding a basket of raspberries from her garden, insisting I take them before they went bad. I had no plan, just cream cheese in the fridge and a bar of white chocolate I'd been hoarding. By evening, I had baked my first swirled cheesecake, and the smell alone made my kitchen feel like a boutique bakery. When I sliced into it the next day, the marbled raspberry ribbons looked almost too beautiful to eat.
I brought this cheesecake to a potluck once, still in the springform pan because I was too nervous to unmold it. A friend's mom, who bakes wedding cakes for a living, took one bite and asked for the recipe on the spot. That moment made me realize that homemade doesn't have to mean humble. Sometimes the messiest kitchens produce the most memorable desserts.
Ingredients
- Graham cracker crumbs: Use store-bought or crush whole crackers in a zip-top bag with a rolling pin for a coarser, more rustic texture.
- Granulated sugar: Divided between crust, raspberry sauce, and batter, it sweetens each layer without competing flavors.
- Melted butter: Binds the crust together and adds a rich, toasty flavor that holds up under the creamy filling.
- Fresh or frozen raspberries: Frozen work just as well and often taste more tart, which I prefer for balance.
- Lemon juice: Brightens the berry sauce and keeps it from tasting flat or one-note.
- White chocolate: Choose a good quality brand with cocoa butter listed first for smooth melting and true flavor.
- Cream cheese: Must be fully softened at room temperature or you'll battle lumps no matter how long you beat it.
- Eggs: Add them one at a time and mix gently to avoid incorporating too much air, which can cause cracks.
- Vanilla extract: A teaspoon is enough to deepen the flavor without overpowering the delicate white chocolate.
- Sour cream: Adds tang and a silky texture that makes each bite feel luxurious.
- Heavy cream: Loosens the batter just enough to pour smoothly and swirl easily with the raspberry sauce.
Tired of Takeout? 🥡
Get 10 meals you can make faster than delivery arrives. Seriously.
One email. No spam. Unsubscribe anytime.
Instructions
- Prep the Pan:
- Preheat your oven to 325°F and grease a 9-inch springform pan, then line the base with parchment paper. This double security makes unmolding later almost foolproof.
- Build the Crust:
- Mix graham cracker crumbs, sugar, and melted butter until the texture resembles wet sand, then press it firmly into the bottom of the pan. Bake for 8 minutes until it smells toasty and looks lightly golden, then let it cool completely before adding batter.
- Make the Raspberry Swirl:
- Combine raspberries, sugar, and lemon juice in a small saucepan and cook over medium heat, stirring often, until it thickens like jam. Strain out the seeds if you want a silky smooth swirl, then set it aside to cool.
- Melt the White Chocolate:
- Use a double boiler or microwave in short 20-second bursts, stirring between each, until the chocolate is smooth and glossy. Let it cool slightly so it doesn't scramble the eggs when you add it to the batter.
- Beat the Cream Cheese:
- In a large bowl, beat softened cream cheese and sugar until completely smooth and fluffy. Add eggs one at a time, mixing just until each disappears into the batter to avoid overbeating.
- Combine the Batter:
- Stir in vanilla, sour cream, and heavy cream until the mixture is silky, then gently fold in the cooled white chocolate. The batter should be thick but pourable, with no streaks of chocolate remaining.
- Layer and Swirl:
- Pour half the batter over the cooled crust, dollop spoonfuls of raspberry sauce on top, and drag a knife through to create marble patterns. Repeat with the remaining batter and sauce, swirling gently without overdoing it.
- Prepare the Water Bath:
- Wrap the outside of the springform pan tightly in two layers of foil to seal out water. Set it in a larger roasting pan and pour hot water around it until the water reaches halfway up the sides of the cheesecake pan.
- Bake Low and Slow:
- Bake for 60 to 70 minutes until the edges are set but the center still jiggles slightly when you gently shake the pan. The residual heat will finish cooking it as it cools.
- Cool Gradually:
- Turn off the oven, crack the door open, and let the cheesecake sit inside for an hour to prevent sudden temperature shock. Remove it from the water bath, then refrigerate for at least 4 hours or overnight before slicing.
 Pin to board
 The first time I served this, my brother-in-law, who claims he doesn't like cheesecake, ate two slices and scraped his fork across the plate for every last crumb. Watching someone forget their own rules over something you made is one of the best feelings in the world. That's when a recipe stops being just instructions and starts feeling like a small celebration.
Choosing Your White Chocolate
Not all white chocolate melts the same way, and I learned this the hard way when a cheap bar seized into a grainy mess. Look for a brand that lists cocoa butter as the first ingredient, not vegetable oil or palm kernel oil. Real white chocolate melts smoothly, tastes creamy instead of waxy, and blends into the batter without separating. I keep a stash of good bars in my pantry now, because the difference in flavor and texture is worth every extra cent.
Getting Clean Slices
The secret to picture-perfect slices is a hot, clean knife. I run mine under steaming water, wipe it dry, and make one smooth cut straight down without sawing. After each slice, I rinse and dry the blade again before the next cut. It feels fussy at first, but the clean edges and intact swirls make it look like you ordered it from a fancy bakery. If you're serving a crowd, keep a tall glass of hot water next to your cutting board.
Make-Ahead and Storage Tips
Cheesecake is one of the best make-ahead desserts because it actually improves after a day or two in the fridge. The flavors meld, the texture firms up, and slicing becomes easier. I often bake mine two days before I need it, wrap the whole pan in plastic wrap, and let it chill undisturbed. Leftovers keep well for up to five days covered tightly, and I've even frozen individual slices wrapped in foil for up to a month.
- Always cool completely before wrapping to avoid condensation that makes the top soggy.
- Garnish with fresh berries and sauce just before serving so they stay vibrant and don't bleed.
- If freezing, thaw slices in the fridge overnight for the best texture.
 Pin to board
 There's something almost meditative about swirling raspberry sauce into pale batter and watching the colors ribbon together. This cheesecake has become my go-to whenever I want to impress without pretending to be a pastry chef, and it never fails to make people lean back in their chairs and sigh.
Recipe Questions & Answers
- → How long should I refrigerate the cheesecake before serving?
Refrigerate for at least 4 hours, but overnight is ideal. This allows the flavors to develop and the texture to set completely, ensuring clean slices and the best consistency.
- → Can I use frozen raspberries instead of fresh?
Absolutely. Frozen raspberries work beautifully for the sauce. You may need to adjust the sugar slightly depending on their natural sweetness. Thaw them slightly before cooking for even results.
- → Why is a water bath necessary for baking?
The water bath creates gentle, moist heat that prevents cracks from forming on the surface. It promotes even cooking and ensures the cheesecake remains creamy throughout without drying out or overbaking.
- → How do I know when the cheesecake is done baking?
The edges should be set and slightly puffed, while the center will still have a gentle wobble when you gently shake the pan. This residual heat completes the cooking as it cools.
- → Can I make this ahead of time?
This dessert actually improves with time. Make it up to 2 days in advance, keeping it refrigerated. Add fresh berry garnish just before serving for the best presentation and texture.
- → What's the best way to get clean slices?
Dip your knife in hot water and wipe it clean between each slice. Use a gentle sawing motion rather than pressing down. For even cleaner cuts, run the knife under warm water periodically.